
Demi Colour for Undereyes


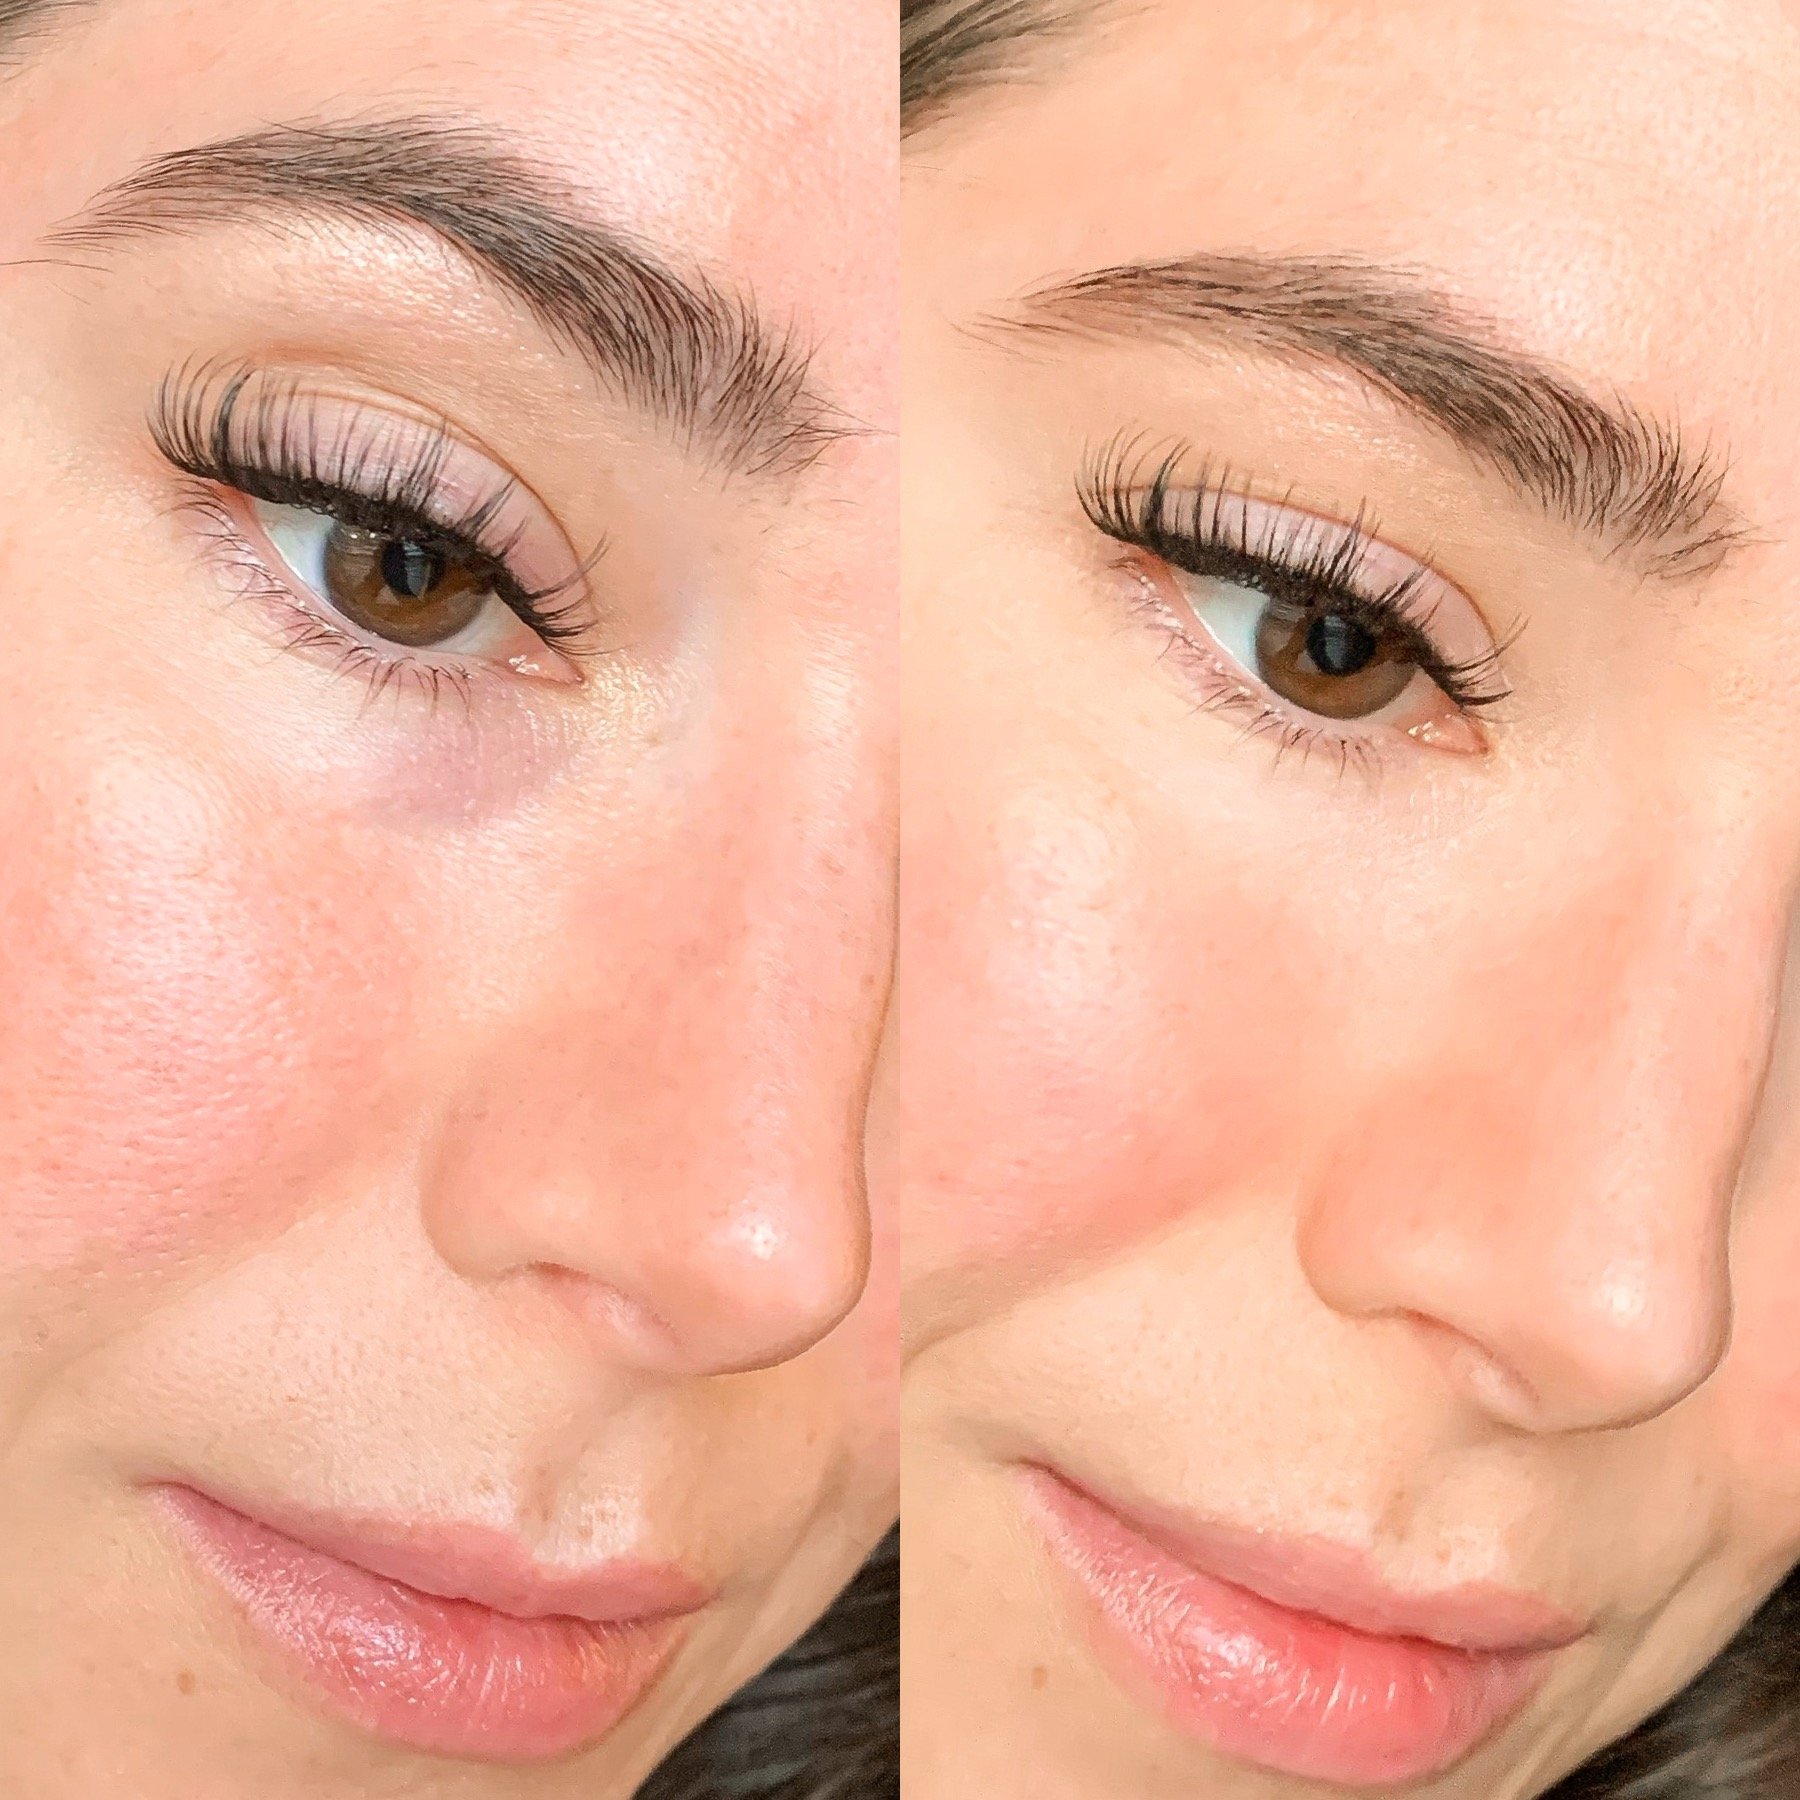
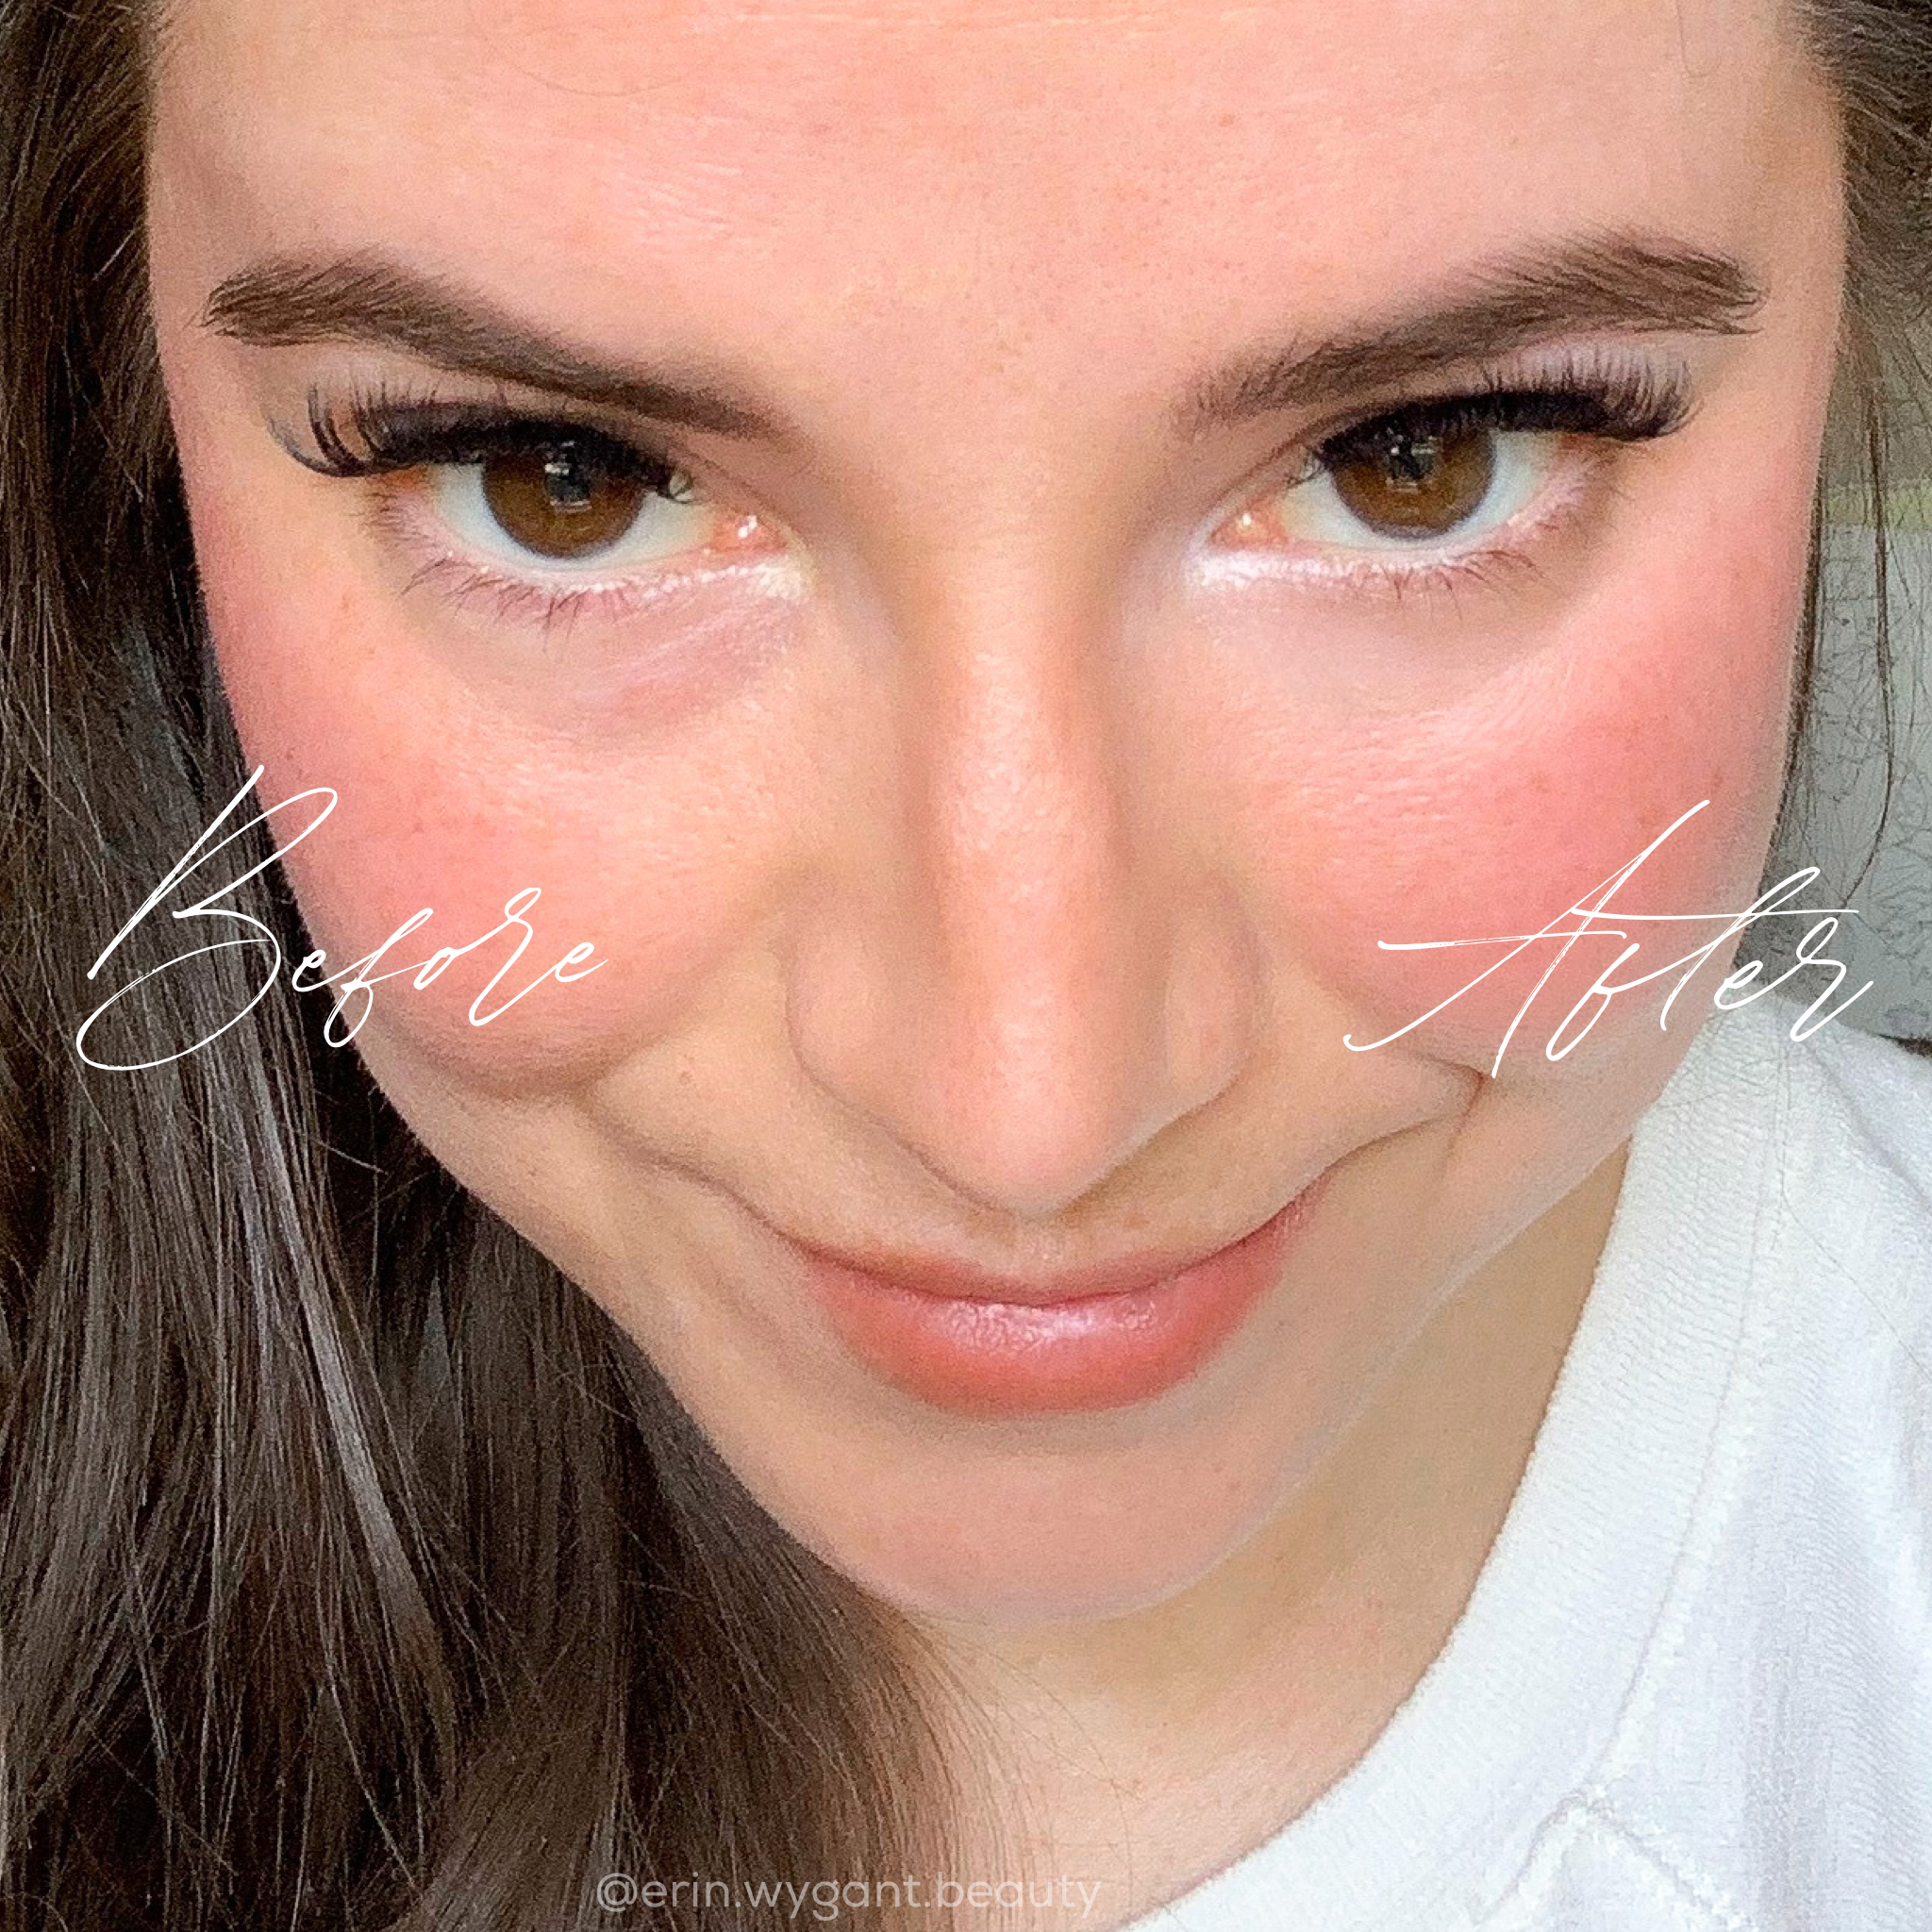
When it comes to makeup, it seems like most people are concerned with hiding the “dark circles” under their eyes. But the “traditional” method of applying concealer and setting powder can make your undereyes look flat, dull, dry, and creased. Which isn’t necessarily the look most of us want.
Demi Colour uses color science to filter away the excess color in the skin, effectively changing what we see. Instead of using concealer in the shade we want our skin to be, using opacity to cover the skin - Demi uses the complimentary color to neutralize the darkness and shadows altogether. Work smarter, not harder! Since such a minute amount of product is needed, there’s nothing to slide around on the skin and nothing to crease or set. Giving you a brighter and more youthful & awake appearance. Our skin of our undereye area is so delicate that any extra makeup texture can take away from its beauty. Nothing preserves the natural radiance & iridescence of your skin like Demi Colour.
No visible makeup texture, no setting powder needed, no caking or creasing, and lasts all day. I mean, that’s the dream, right?? With The Demi Method, it can be a reality.
(Want to learn more about the Demi Method fundamentals? Go here.)
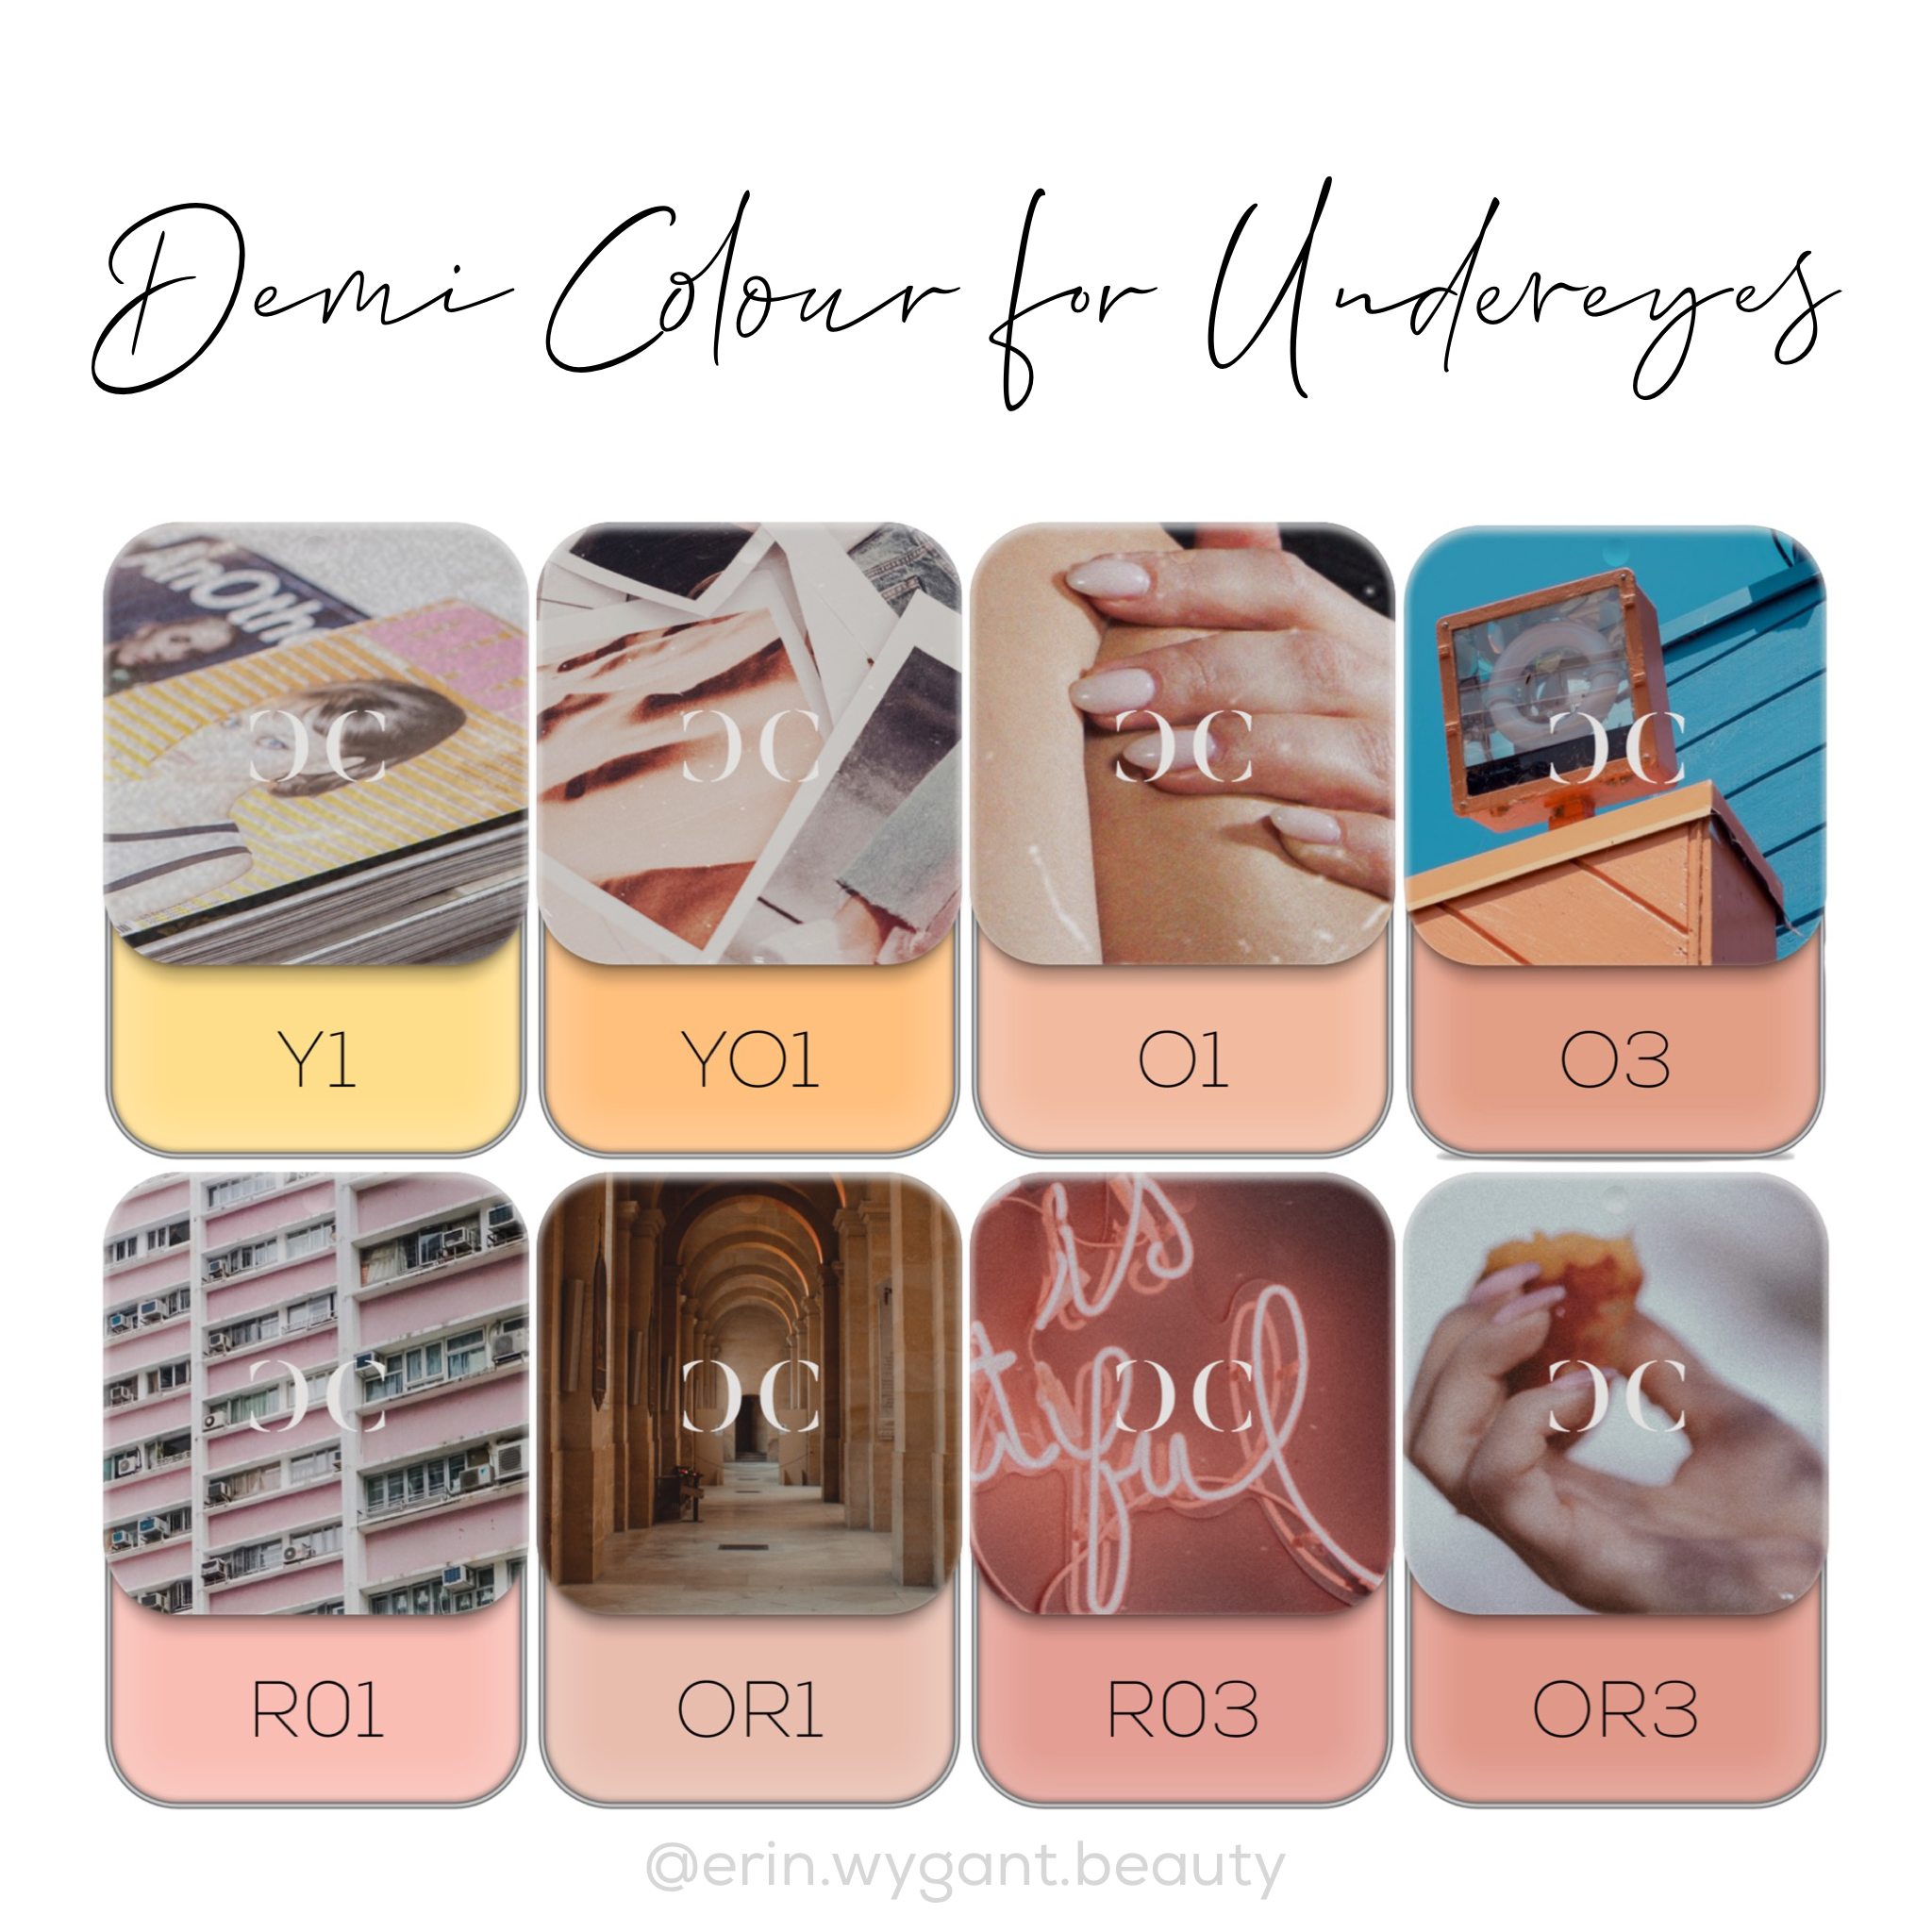
Most of us have excess blue causing shadows under our eyes. That blue could also be violet-blue and/or green-blue. So complimentary shades of pink, yellow, and orange will be what you need. (I personally primarily use O1 for my undereye area, and sometimes I also use RO1 and YO1 as well.)

When I first started using Demi Colour, mastering the undereye area was my most difficult challenge. I often ended up frustrated and couldn’t understand why it wasn’t “working”. I was using too much product and it would crease in my fine lines. I wasn’t sure what excess colors were there (because I was still learning how to identify colors in the skin). Then one day I was in a rush and just used the smallest amount of O1 on the absolute darkest points and then - boom - it clicked for me. And then from that point on it was just easy. I stopped fighting my eyes. I just did the least, and it gave me the most.
Try to do the least amount of filtering possible. You need to know when to hold back. You don’t want to erase every bit of color under your eyes! That would be quite time consuming, and you would end up with a “reverse racoon” eye effect. You just want to remove the most distracting spots so that when you look at your face your attention isn’t immediately drawn to the shadows but you still look like yourself! Some shadows under the eyes can still look natural and pretty. Even small children have shadows under their eyes! This method isn’t meant to give you a flat one-color undereye - it should still look natural. The beauty of Demi Colour is in the subtlety. It might take some time to get the hang of it, but once you do it’s life changing.
Adding Color Under the Eyes


Yes, you read that right! Most of us are only concerned with brightening darkness under the eyes. But that’s only looking at half of the problem.
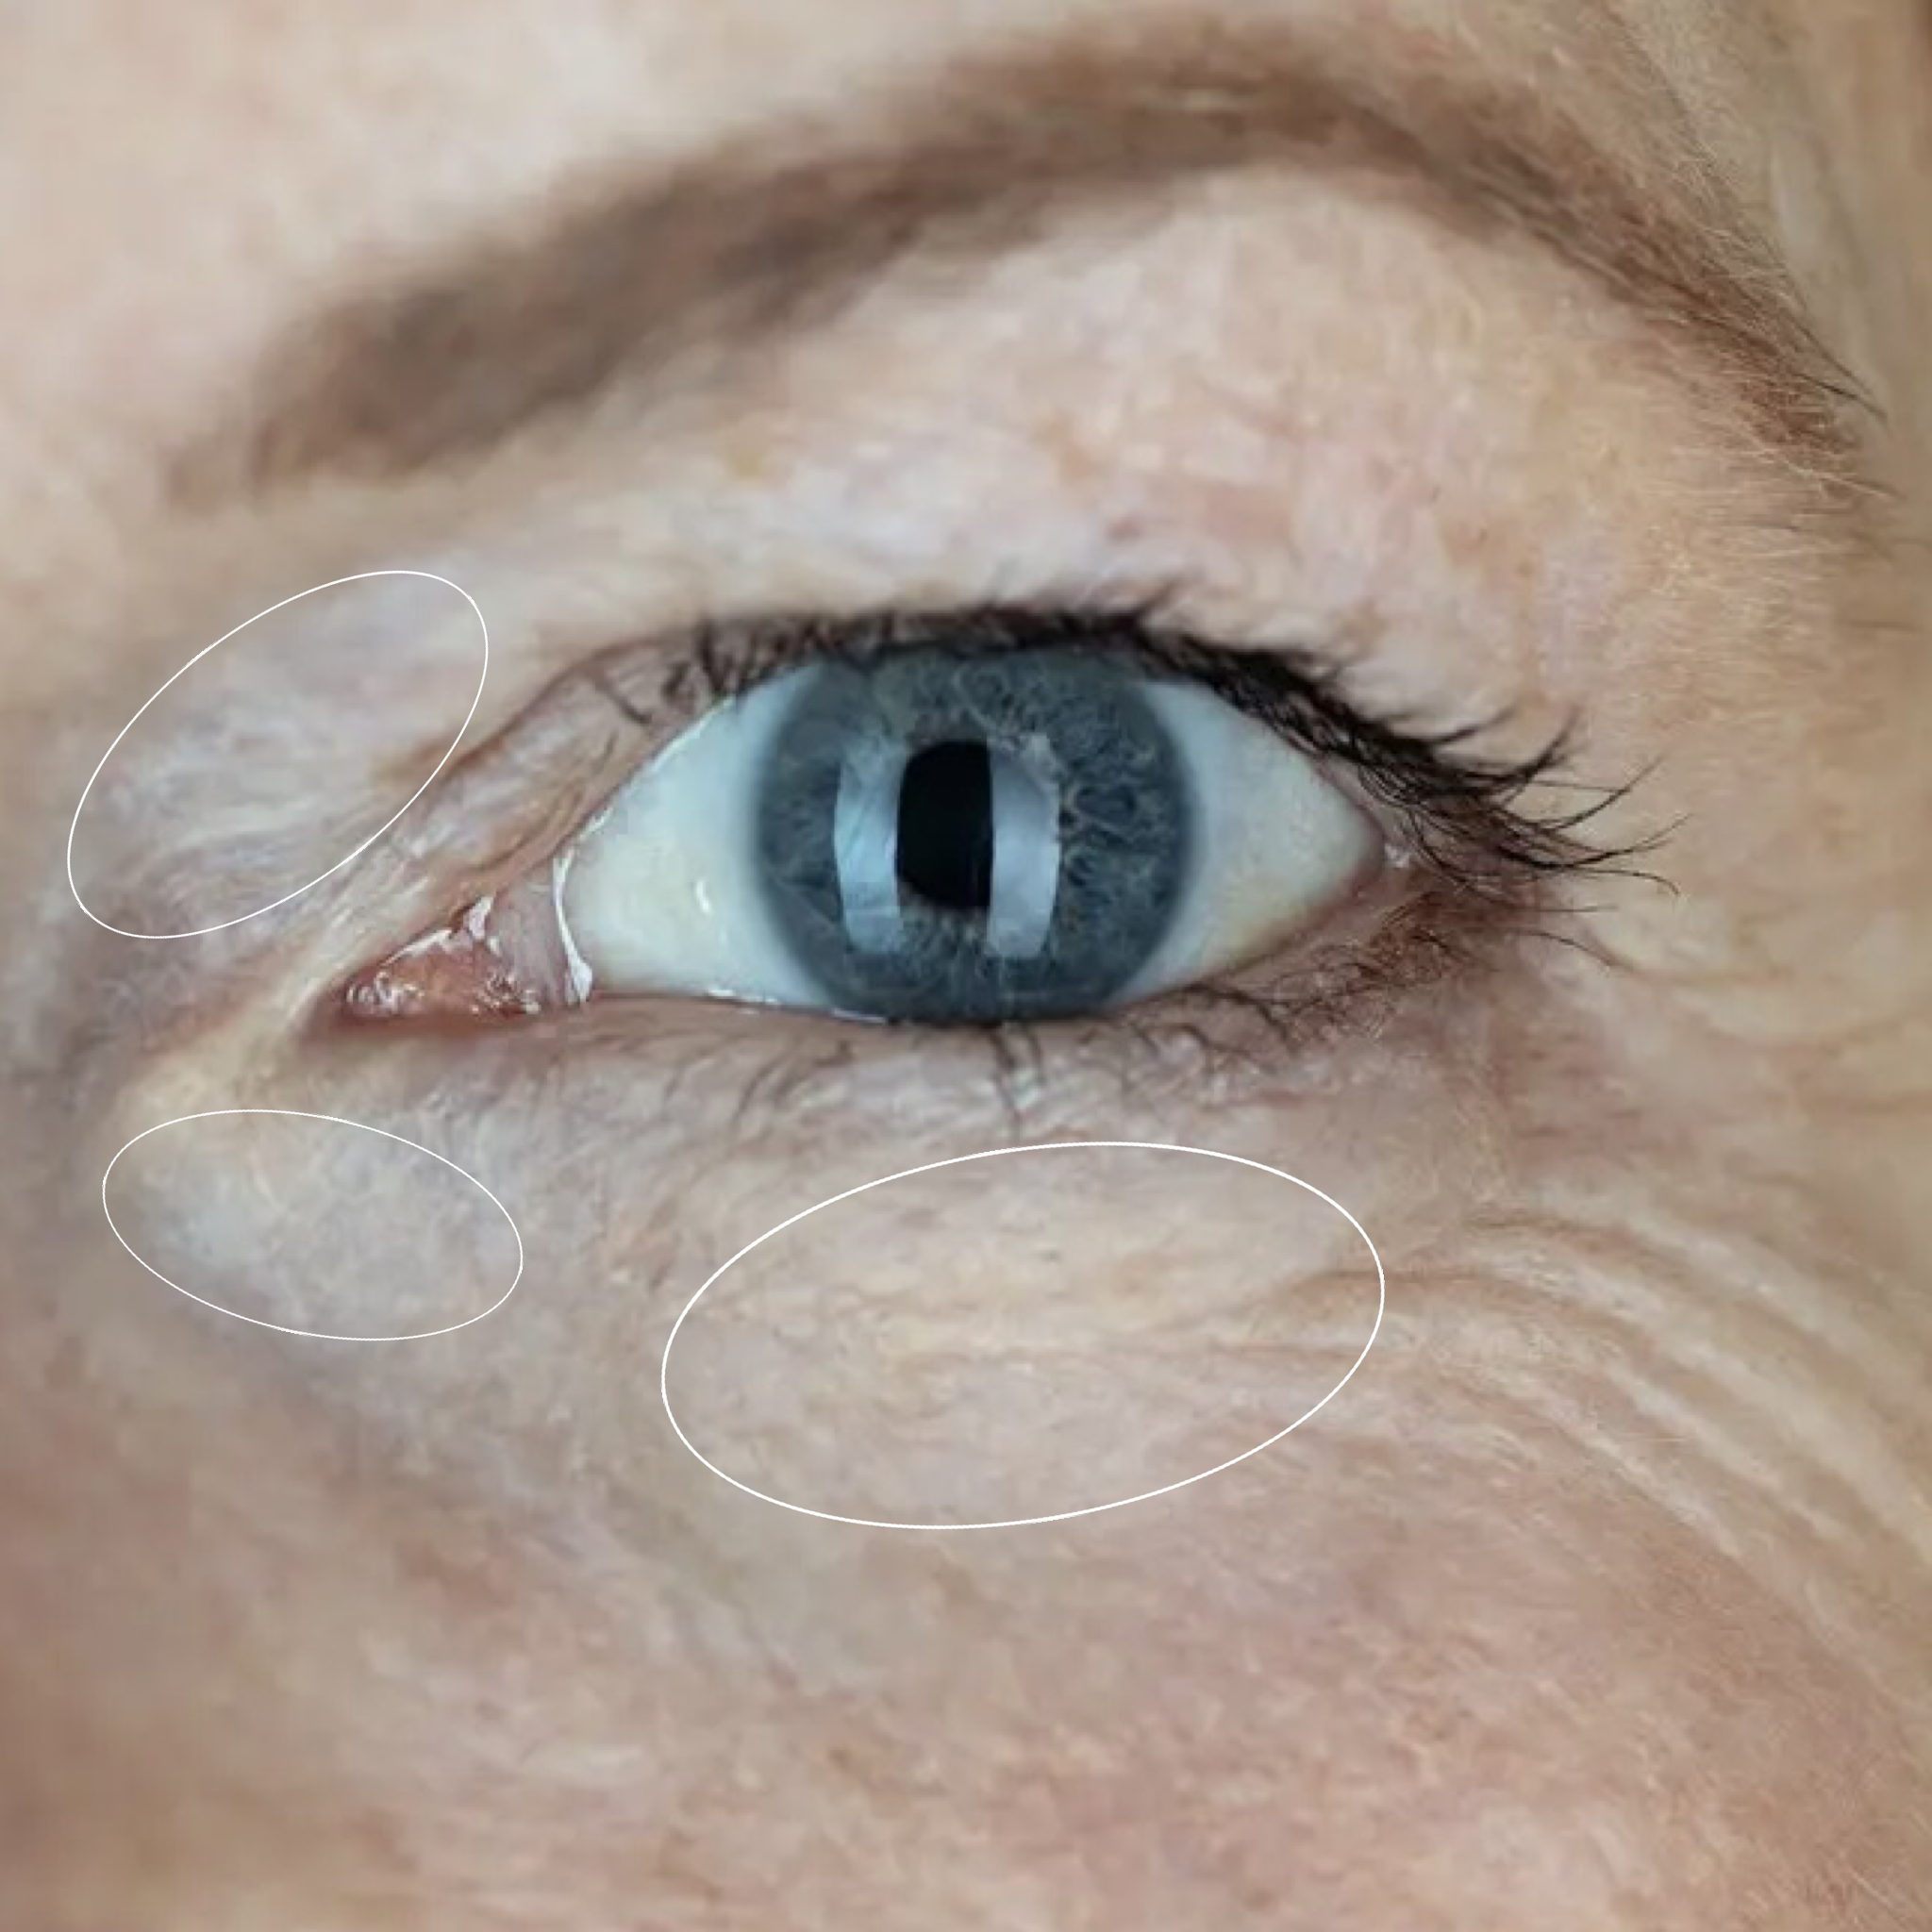
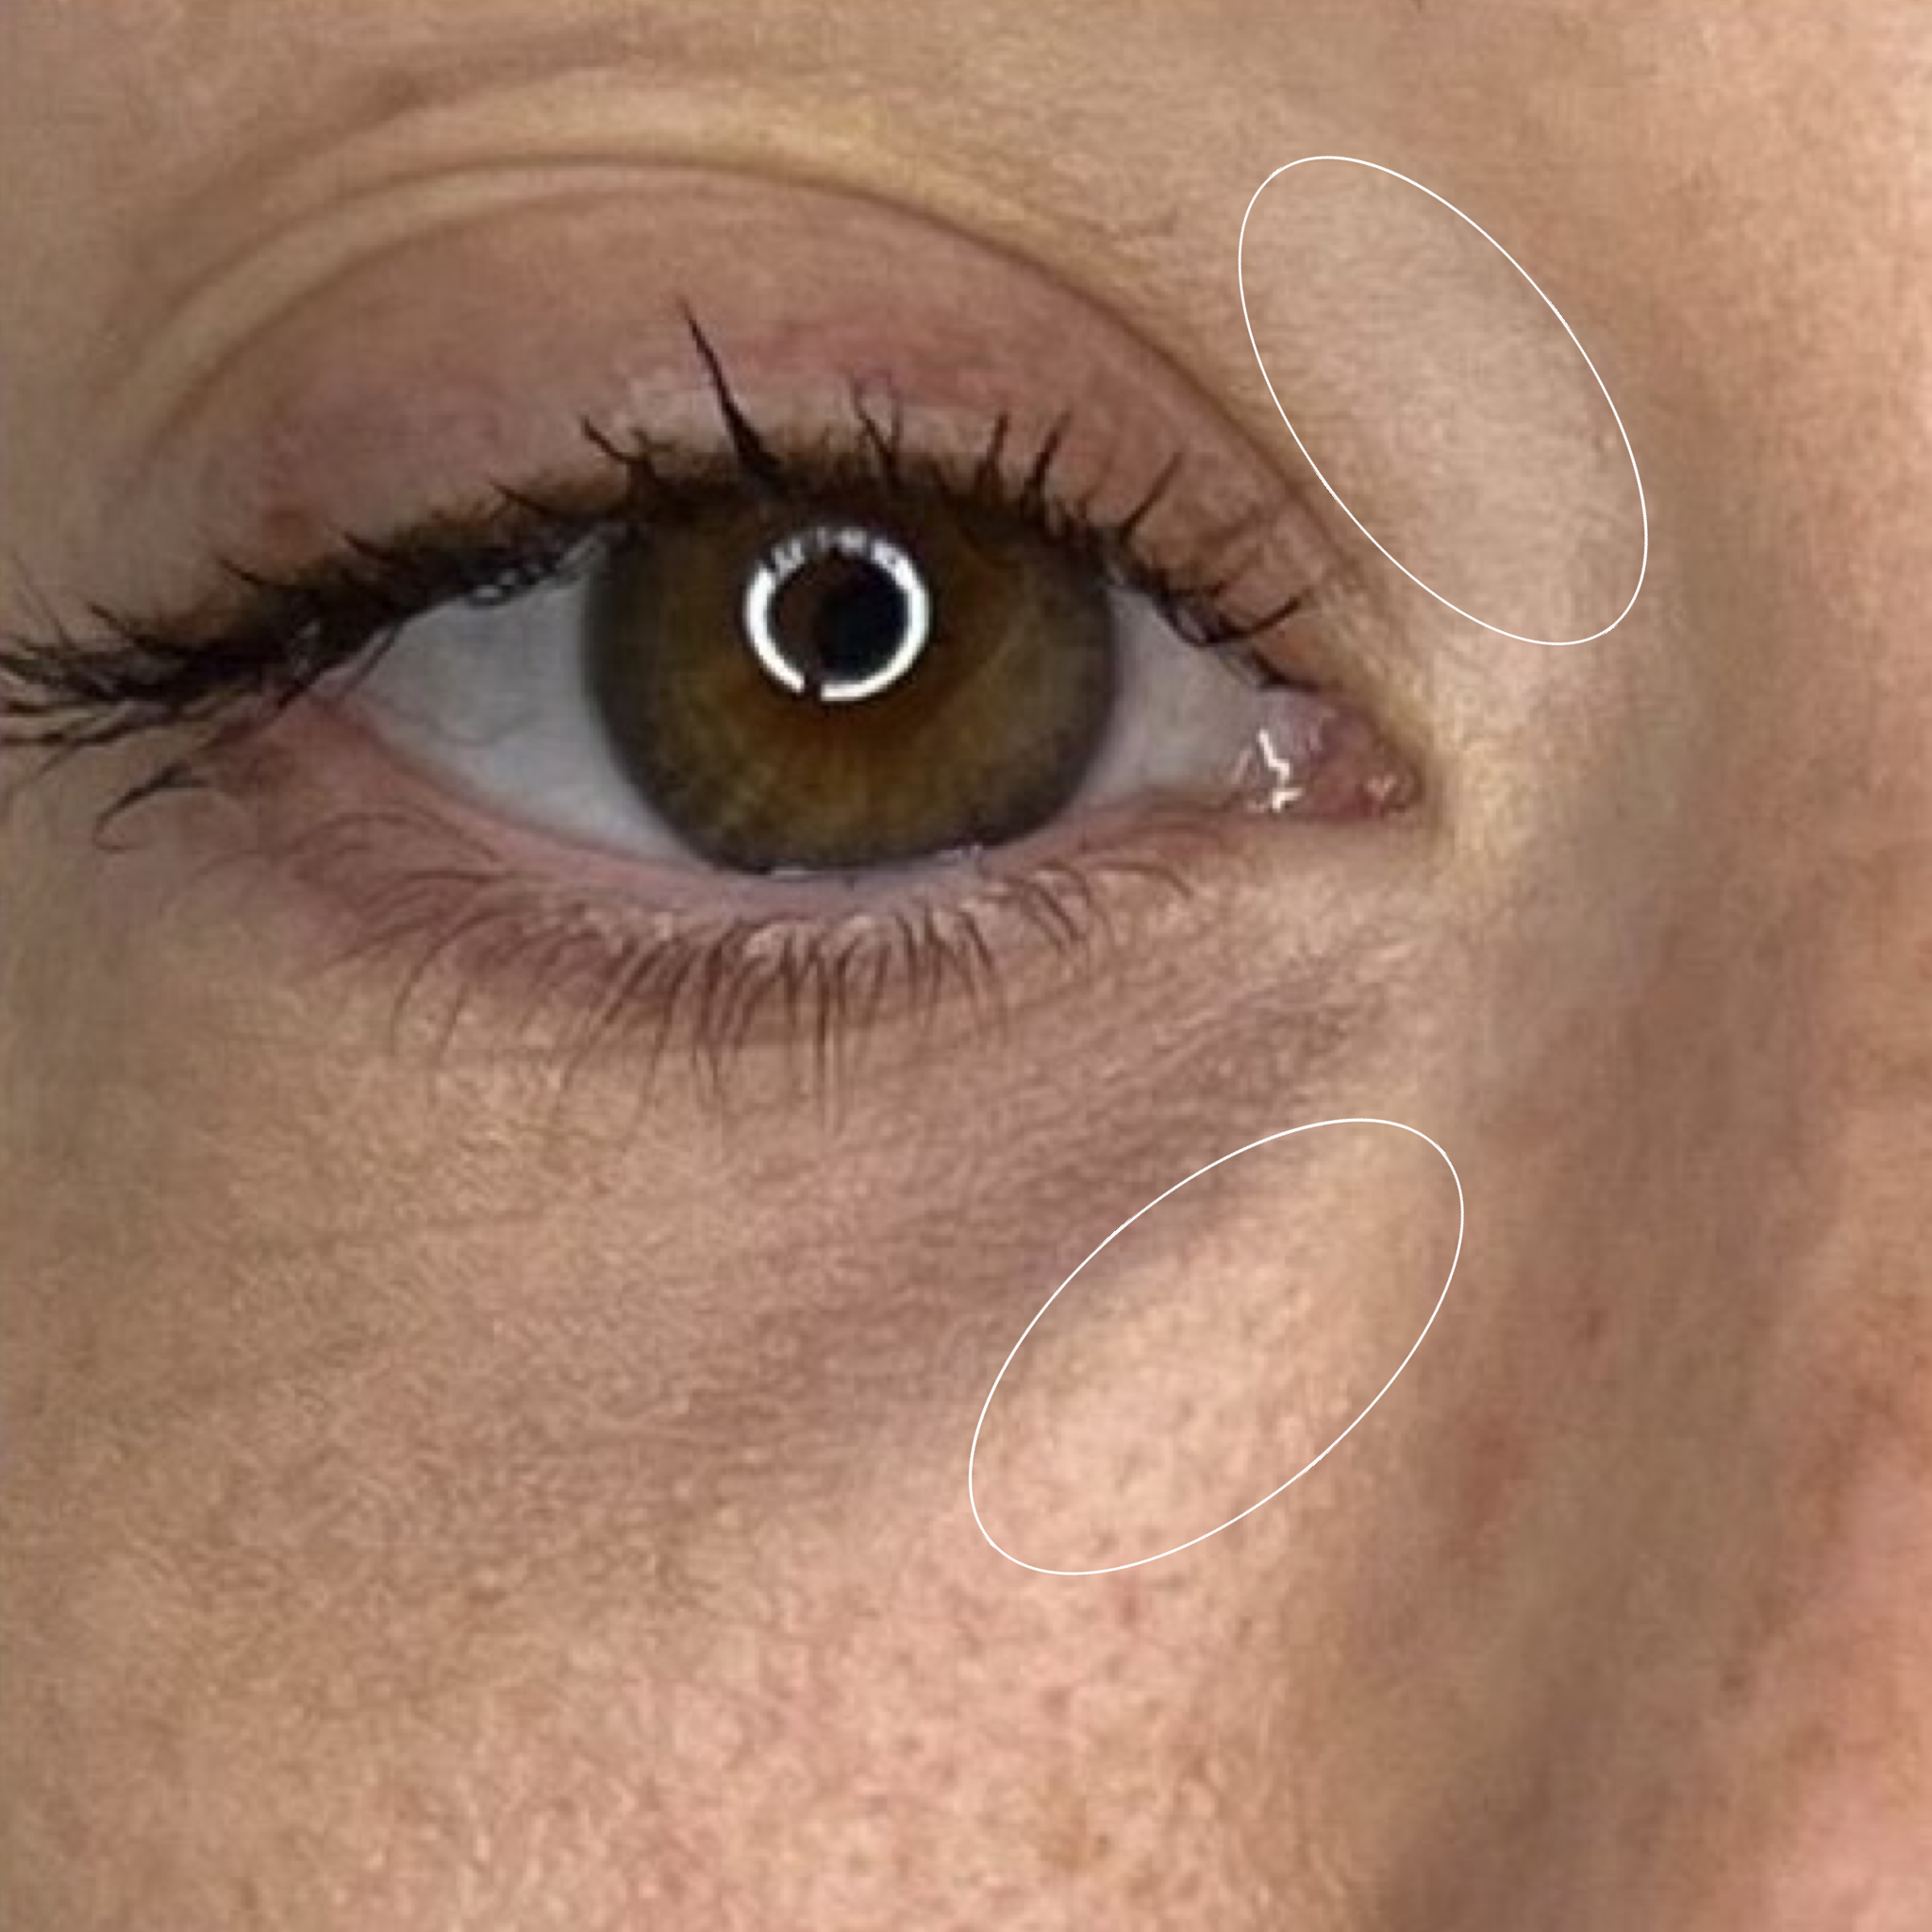
The most distracting things in the face are not just darkness, but CONTRAST. A light spot on the face can be just as distracting as darkness. And if there is a dark spot next to a light spot - it’s DOUBLY distracting.
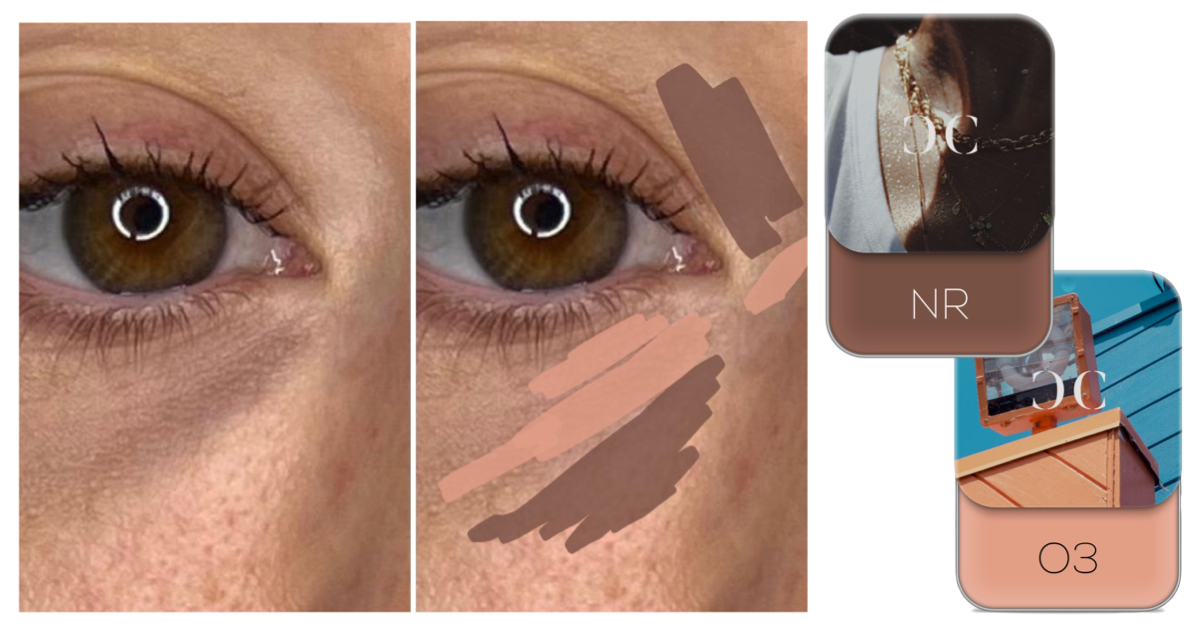
Many of us tend to have areas of lightness around our eyes. (Which can give a “reverse racoon eye” effect.) Adding color with bronzer, contour, or a neutral Demi shade (my favorite is NR) to these light areas will make a huge difference and will help bring the whole area back into balance with the rest of the face.
How to Use Demi to Filter Undereye Darkness
First of all, do NOT swipe a single Demi Colour solidly all over the undereye area. I know that’s what you instinctually want to do, based on years of ingrained “traditional” makeup and concealer use! But that’s a habit and mindset you need to adjust when using Demi.
LOOK at your skin. You will need to learn and develop the ability to identify excess colors in the skin. (If you need help learning the fundamentals of Demi Colour, head here to read more!) Most people think they have “purple” undereyes, but what you’re really see is probably some form of excess blue causing darkness.
Find the absolute DARKEST point, and try filtering it with orange Demi Colour (O1 if you’re fair and the darkness is reasonable, and O3 if you have a deeper skin tone and/or the darkness is deep).
If an area looks more brown, muddy, sallow, if you have freckles or age spots creating an area of darkness - that is probably an excess green-blue so you should use pink-orange (RO1, OR1, RO3, OR3).
If an area looks more vibrant, violet - that is probably an excess violet-blue so you should use yellow-oranges (Y1, YO1).
As always with Demi Colour, it shouldn’t look like you’re covering the skin with color, it should look like you’re filtering - almost like you’re “wiping away” the distraction.
Take a step back and reassess before continuing on to the next most distracting spot. I guarantee your undereyes are not as “terrible” as you think they are! You almost certainly don’t need as much makeup as you think you do in this area.
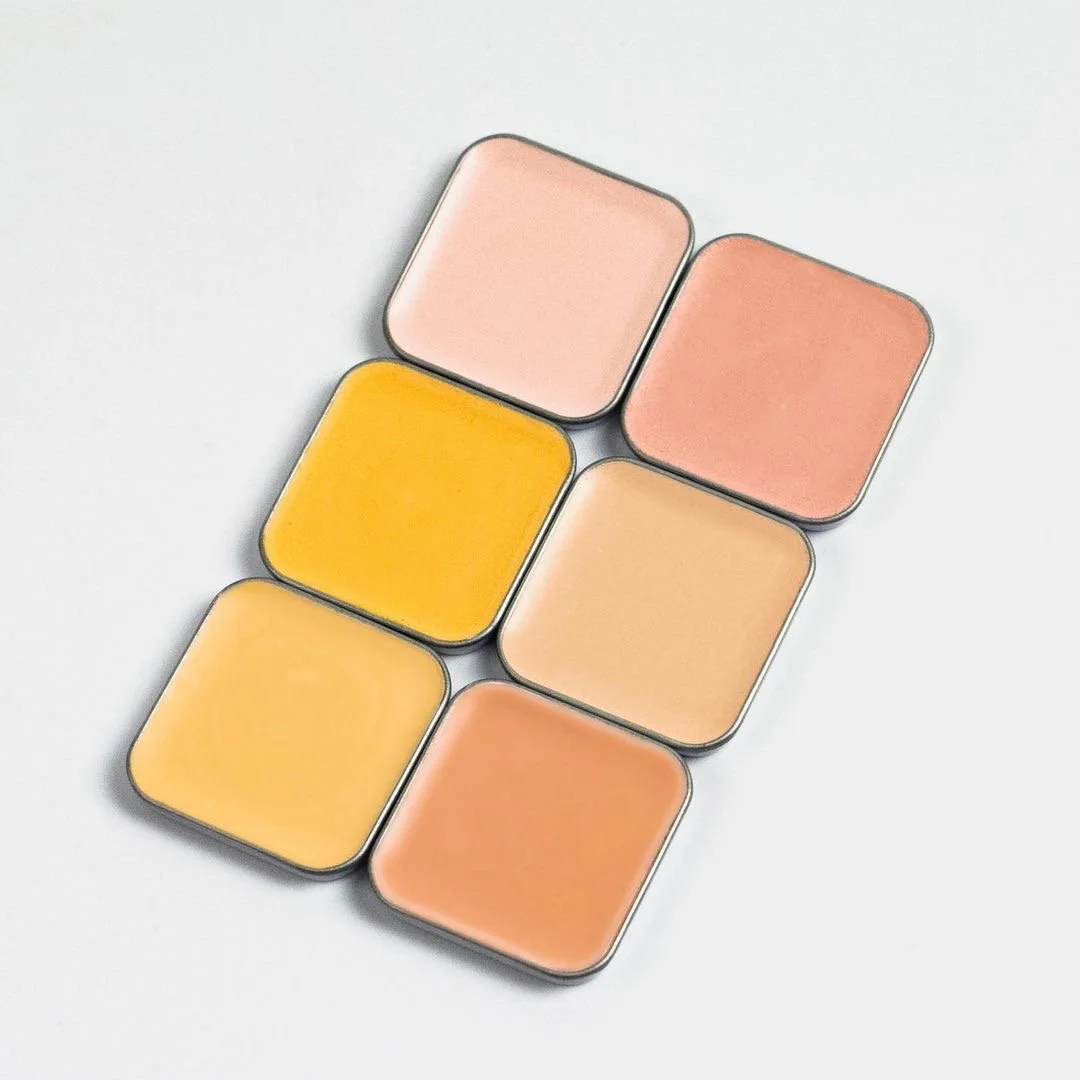
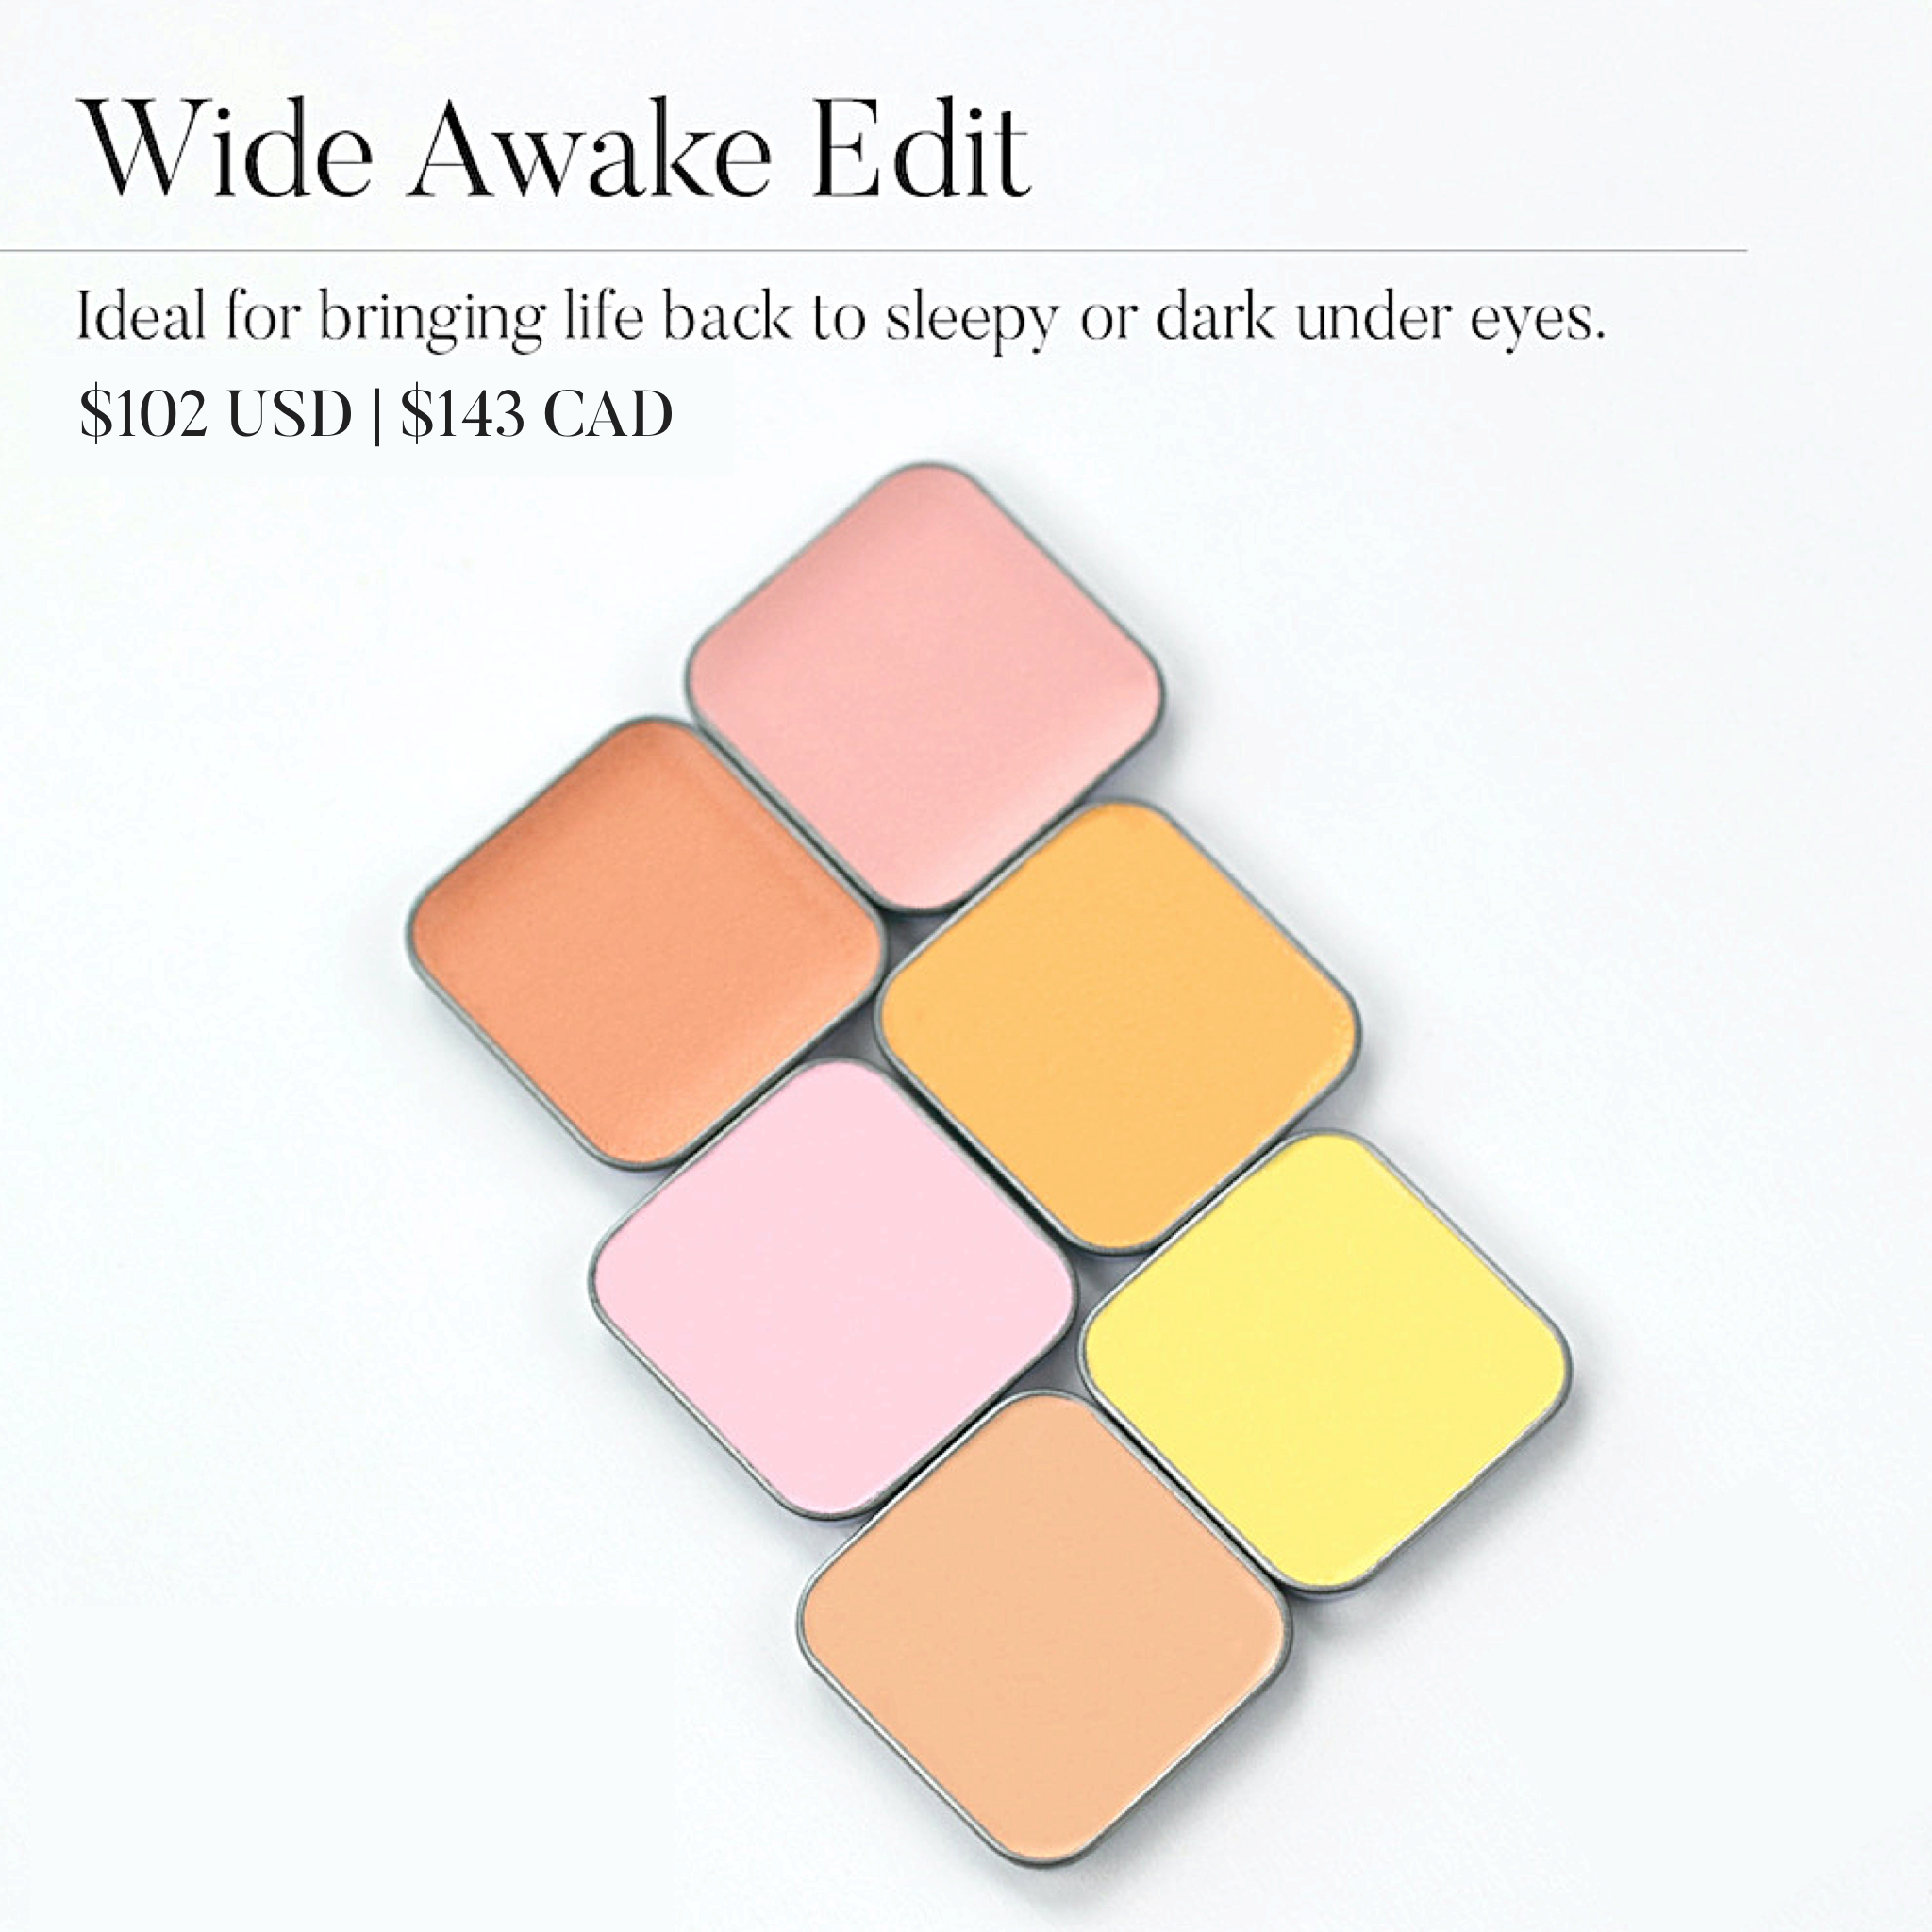
The Wide Awake Edit
Brighten your under eyes and feel fresh-faced with this magical collection. The Wide Awake Edit is ideal for bringing life back to sleepy or dark under eyes.
Personally, I feel like this is the most versatile of all the Demi Edits. Not only does it have all the shades you need to filter your eye area, but it also just has the most basic, staple, multipurpose Demi shades that you can use to filter most distractions on the face! If you get just one Edit, make it this one.
Includes Demi Correctors in shades O1, YO1, Y1, O3, R1 and RO1. Brush and palette not included.
If you need help choosing Demi Colours for your skin tone and skin concerns, click here to get color matched by me! I will email you some personalized recommendations.


